
Essential Tips for Successful Shower Regrouting
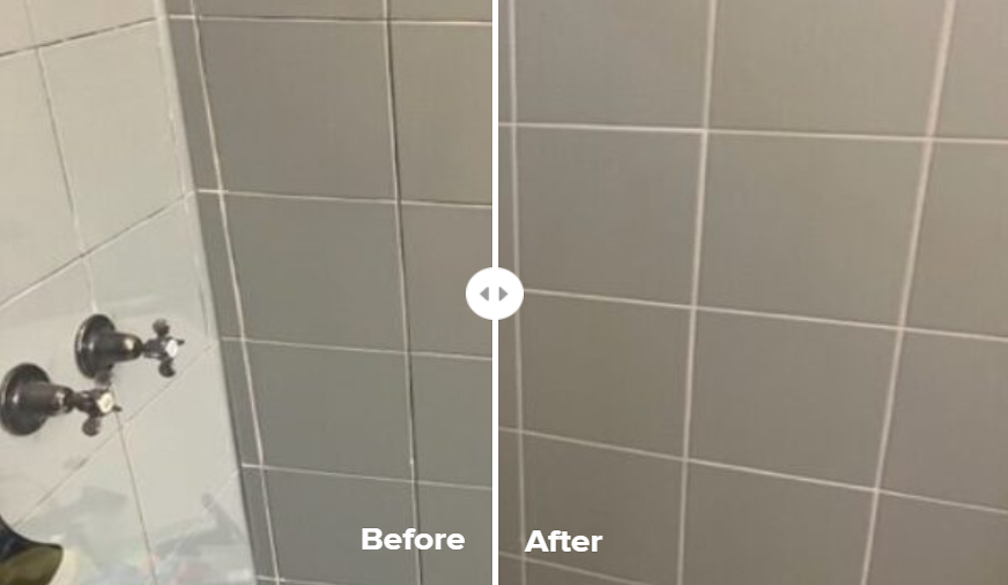
Over time, the grout in your shower can become stained, cracked, or moldy, detracting from the appearance and cleanliness of your bathroom. Regrouting your shower tiles is a cost-effective way to refresh the look and ensure a watertight seal, preventing water damage and mold growth. Whether you're tackling this project yourself or hiring a professional, following these essential tips will help ensure a successful shower regrouting process:
1. Inspect and Prepare the Existing Grout
Before starting the regrouting process, thoroughly inspect the existing grout lines. Look for cracks, discoloration, or areas where the grout has loosened. Use a grout saw or rotary tool with a grout removal attachment to carefully remove the old grout from between the tiles. Ensure all debris and loose grout are cleaned out to create a clean and smooth surface for the new grout.
2. Choose the Right Grout
Selecting the appropriate grout is crucial for a durable and attractive finish. Consider factors such as color, type (sanded vs. unsanded), and water resistance. Sanded grout is typically used for wider grout lines, while unsanded grout is suitable for narrower joints. For showers, choose a grout that is mold-resistant and designed for wet environments to prevent future mold and mildew growth.
3. Prep the Tile Surface
Before applying new grout, clean the tile surface thoroughly to remove soap scum, mineral deposits, and any residues. Use a tile cleaner or mild detergent and water solution, scrubbing with a stiff brush or sponge. Rinse the tiles thoroughly and allow them to dry completely before proceeding with the regrouting process.
4. Mix Grout Properly
Follow the manufacturer's instructions carefully when mixing grout. Use a clean bucket and mix only the amount of grout that can be applied within the manufacturer's specified working time. Mix the grout to a smooth, lump-free consistency using a margin trowel or grout mixing paddle attached to a power drill. Let the mixed grout sit for a few minutes before applying to allow it to "slake."
5. Apply Grout
Using a rubber float or grout float, apply the mixed grout diagonally across the tile joints, pressing firmly to ensure the joints are completely filled. Work in small sections to prevent the grout from drying too quickly. Hold the float at a 45-degree angle and use it to remove excess grout from the tile surface while filling the joints evenly.
6. Tool and Shape Grout Lines
After applying the grout, use a damp sponge to gently wipe away excess grout from the tile surface, making sure not to remove grout from the joints. Rinse the sponge frequently in clean water and continue wiping until the tile surface is clean and smooth. Use a grout finishing tool or rounded stick to shape the grout lines and create a neat, uniform appearance.
7. Allow Grout to Cure
Allow the grout to cure for the time recommended by the manufacturer, usually 24 to 72 hours depending on the type of grout. Keep the shower area dry and avoid using it during this curing period to allow the grout to harden and set properly.
8. Apply Grout Sealer
Once the grout has cured completely, apply a grout sealer to protect the grout from stains and moisture penetration. Use a small brush or applicator bottle to apply the sealer evenly over the grout lines. Wipe off any excess sealer from the tile surface with a clean cloth. Allow the sealer to dry according to the manufacturer's instructions before using the shower.
9. Maintain the Grout
Regular maintenance is key to preserving the appearance and longevity of your newly regrouted shower. Keep the shower area clean by regularly wiping down tiles and grout with a mild cleaner and sponge. Avoid harsh abrasives or acidic cleaners that can damage the grout or tiles.
10. Consider Professional Help
If you're unsure about regrouting or if the job requires extensive repairs, consider hiring a professional grout specialist or tile installer. Professionals have the experience, tools, and knowledge to ensure a flawless regrouting job and can provide advice on grout selection and maintenance.
Conclusion
Regrouting your shower is a practical way to rejuvenate your bathroom and maintain a clean, watertight seal around your tiles. By following these essential tips—from preparing the surface and choosing the right grout to applying it properly and sealing for protection—you can achieve a successful shower regrouting project. Whether you're a DIY enthusiast or seeking professional assistance, proper preparation and attention to detail will ensure a durable and attractive finish that enhances the beauty and functionality of your shower space.